Like my previous post, I've been experimenting with digital painting yet again. This time I put together a step by step of my process, although there's a bit of a gap from step 3 to step 4. Hopefully you'll still find it worthwhile to look at.

First step was value block-ins for the background, then a sketch of the character.

I began adding in colors roughly, and also changed the color of the linework so it wasn't so overpowering.

In this step I added a multiply layer over everything, filled it with a medium purple value, then erased out highlights. I also put a multiply layer on top of that with a paper texture to unify colors further.. and just to add some texture.

From there, I flattened the image and began to paint over everything, sampling colors that were already in the drawing. Added in darks, but highlights remained mostly the same.
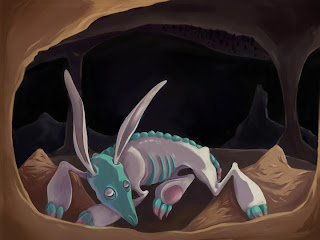
The final image. Small touch ups from Step 4, then brought into photoshop where I added two multiply textures and a fill color multiply layer on top of everything to unify colors and make it more brown in color.

 The final image. Small touch ups from Step 4, then brought into photoshop where I added two multiply textures and a fill color multiply layer on top of everything to unify colors and make it more brown in color.
Who's awesome?
ReplyDeleteYOU'RE AWESOME!